


Home > Bathroom Advice > Homeowners
How To tighten a Villeroy & Boch toilet seat
A simple how-to guide for owners
While it may seem like a small annoyance, a loose toilet seat can put extra strain on the hinges and fixings, causing unnecessary wear over time.
Fortunately, tightening a Villeroy & Boch toilet seat is a quick and simple DIY task that restores stability, improves everyday comfort and increases longevity.
A few minutes of simple maintenance can keep your Villeroy & Boch toilet seat secure, comfortable and working at its best for decades to come.
Why does a toilet seat become loose?
Toilet seats become loose from everyday use. Each time the seat is lifted, lowered or sat on, small amounts of movement put pressure on the hinges and fixings. Over time this causes the bolts securing the seat to the toilet to loosen, leading to the familiar wobble many homeowners face.
Loosening is a normal part of long-term use — regular tightening keeps everything secure and functioning perfectly.
A Villeroy & Boch toilet seat
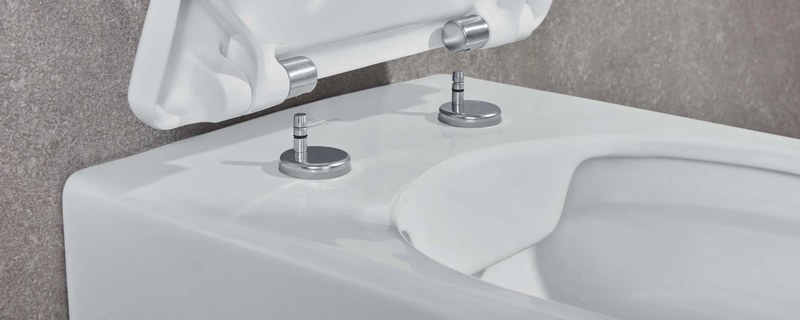
Unlike many toilet seats that require access underneath the pan, a Villeroy & Boch toilet seat has a top-fix design, which means you can reach the fixing points from above.
The benefit of a top-fix seat is that routine adjustments are easier — and easier maintenance means it is done more often, keeping the seat more hygienic and more pleasant to use.
Follow this quick step-by-step guide to tighten a Villeroy & Boch toilet seat.
Step by step guide
What you will need
Villeroy & Boch toilet seats are fitted with two different types of top-fixing hinge systems. The type of hinge determines which tool is required to tighten the seat:
- The spanner that came with your toilet seat (for indent-type fixings) or a star screwdriver (for cover cap fixings)
- Rubber gloves (optional)
- A cloth for cleaning around the hinge area
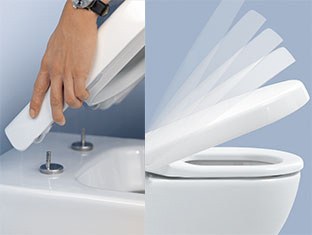
Remove the toilet seat
To remove the toilet seat completely, grip the seat firmly and pull straight up until it releases from the hinge mounting. This gives you a clear view of the hinge area and allows you to clean away any dust, dirt or moisture that may have built up. Cleaning products and moisture contribute to wear around the fixing components, so it is best to keep them dry.
The tool you need is determined by the fixing hinge
A. Indent-type fixing hinge


If the exposed hinge doesn't have a cover cap, you'll see a small flat section, or indent, on the hinge arm. This fixing type uses the dedicated spanner that came with the seat. Position the spanner onto the indent and turn clockwise with firm, steady pressure. Tighten both sides evenly, being careful not to over-tighten.
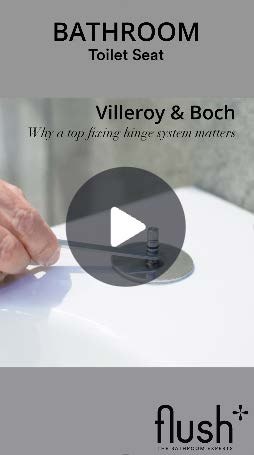
B. Cover cap fixing hinge

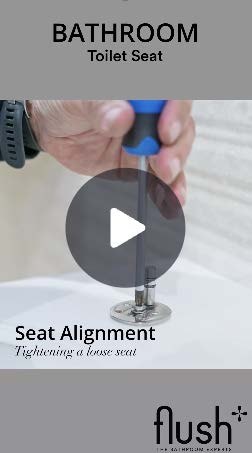
If the exposed hinge has stainless-steel cover caps, gently lift them to reveal the fixing bolts underneath. Then, using a flat-head or star screwdriver, tighten each bolt by turning clockwise. Alternate between both sides as you work to help keep the seat aligned and balanced.
Refit the toilet seat
Push the seat firmly back onto the hinge mounting until it clicks securely into place. If your model uses cover caps, replace them before finishing. Once everything is reassembled, gently test the seat by applying light pressure and checking for any movement. If a slight wobble remains, repeat the tightening process and make small adjustments until the seat feels stable.
Seat alignment
Check that the seat and the toilet align once the hinge has been tightened. The seat must sit evenly on both sides of the bowl and be properly aligned at the front. A centred seat feels more comfortable during use and is less likely to become loose again.

Toilet seat maintenance tips
A few simple habits can keep your toilet seat secure for longer:
- Check the fixings every six months.
- Avoid harsh or abrasive cleaning products around the hinges.
- Clean behind the seat regularly to prevent build-up.
- Store your supplied spanner in a safe place for future maintenance.

When to replace the toilet seat?
If the seat continues to move after tightening, or if you see visible damage to the hinges or fixing parts, it may be time to think about a replacement.
Addressing worn or damaged parts early helps prevent further issues and ensures your bathroom remains comfortable and functional.

Finally…
Villeroy & Boch toilet seats are engineered so that cleaning or tightening a loose seat is a simple, quick job requiring minimal effort.
An easy-to-clean toilet seat ensures that the bathroom stays well-kept and hygienic.
Explore the sanware of
 at
at

Discover the toilet seats, toilets, flush plates, baths, basins and sanware fittings crafted for quiet longevity and available online.
Shop Villeroy & Boch

